# BOS

Built for swing traders who trade with conviction. BOS waits for the market to prove itself before drawing a range.

***

<figure><img src="https://2404540482-files.gitbook.io/~/files/v0/b/gitbook-x-prod.appspot.com/o/spaces%2FuK39Nj2efLknCBW9clay%2Fuploads%2Fgit-blob-82fd9e5ab568a1c2535c3d43eccb63a022f2cc50%2Fimage%20(6).png?alt=media" alt=""><figcaption></figcaption></figure>

***

> <kbd><mark style="color:purple;">**BOS Mode**<mark style="color:purple;"></kbd> is based on a slower, more complete, and cleaner trend change.\
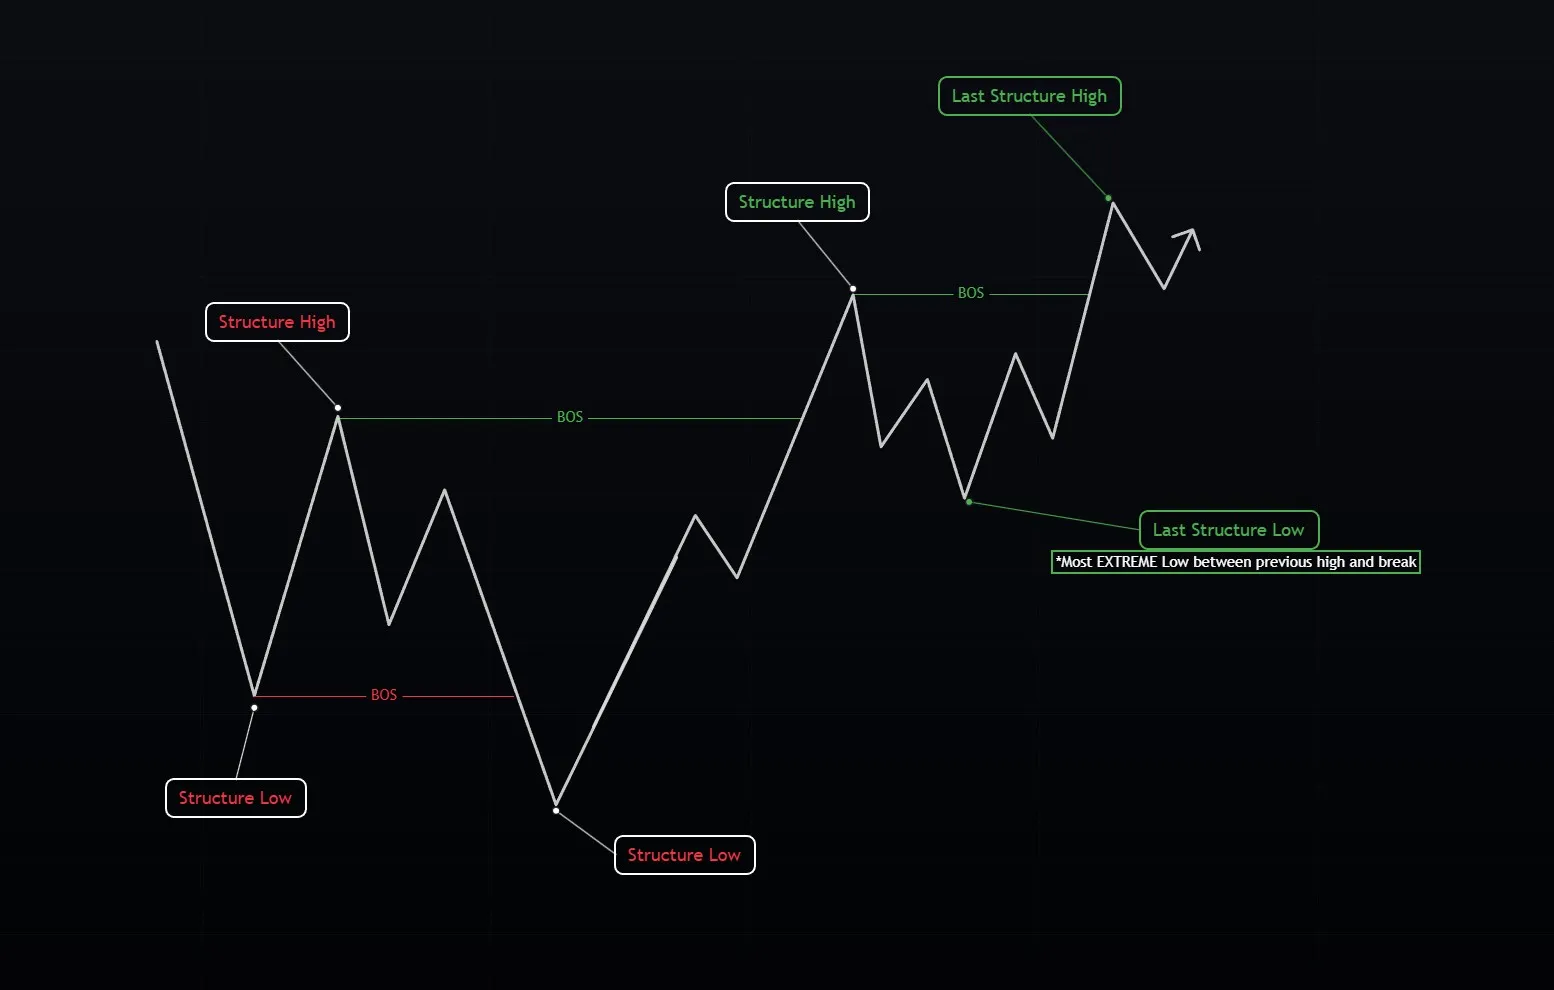
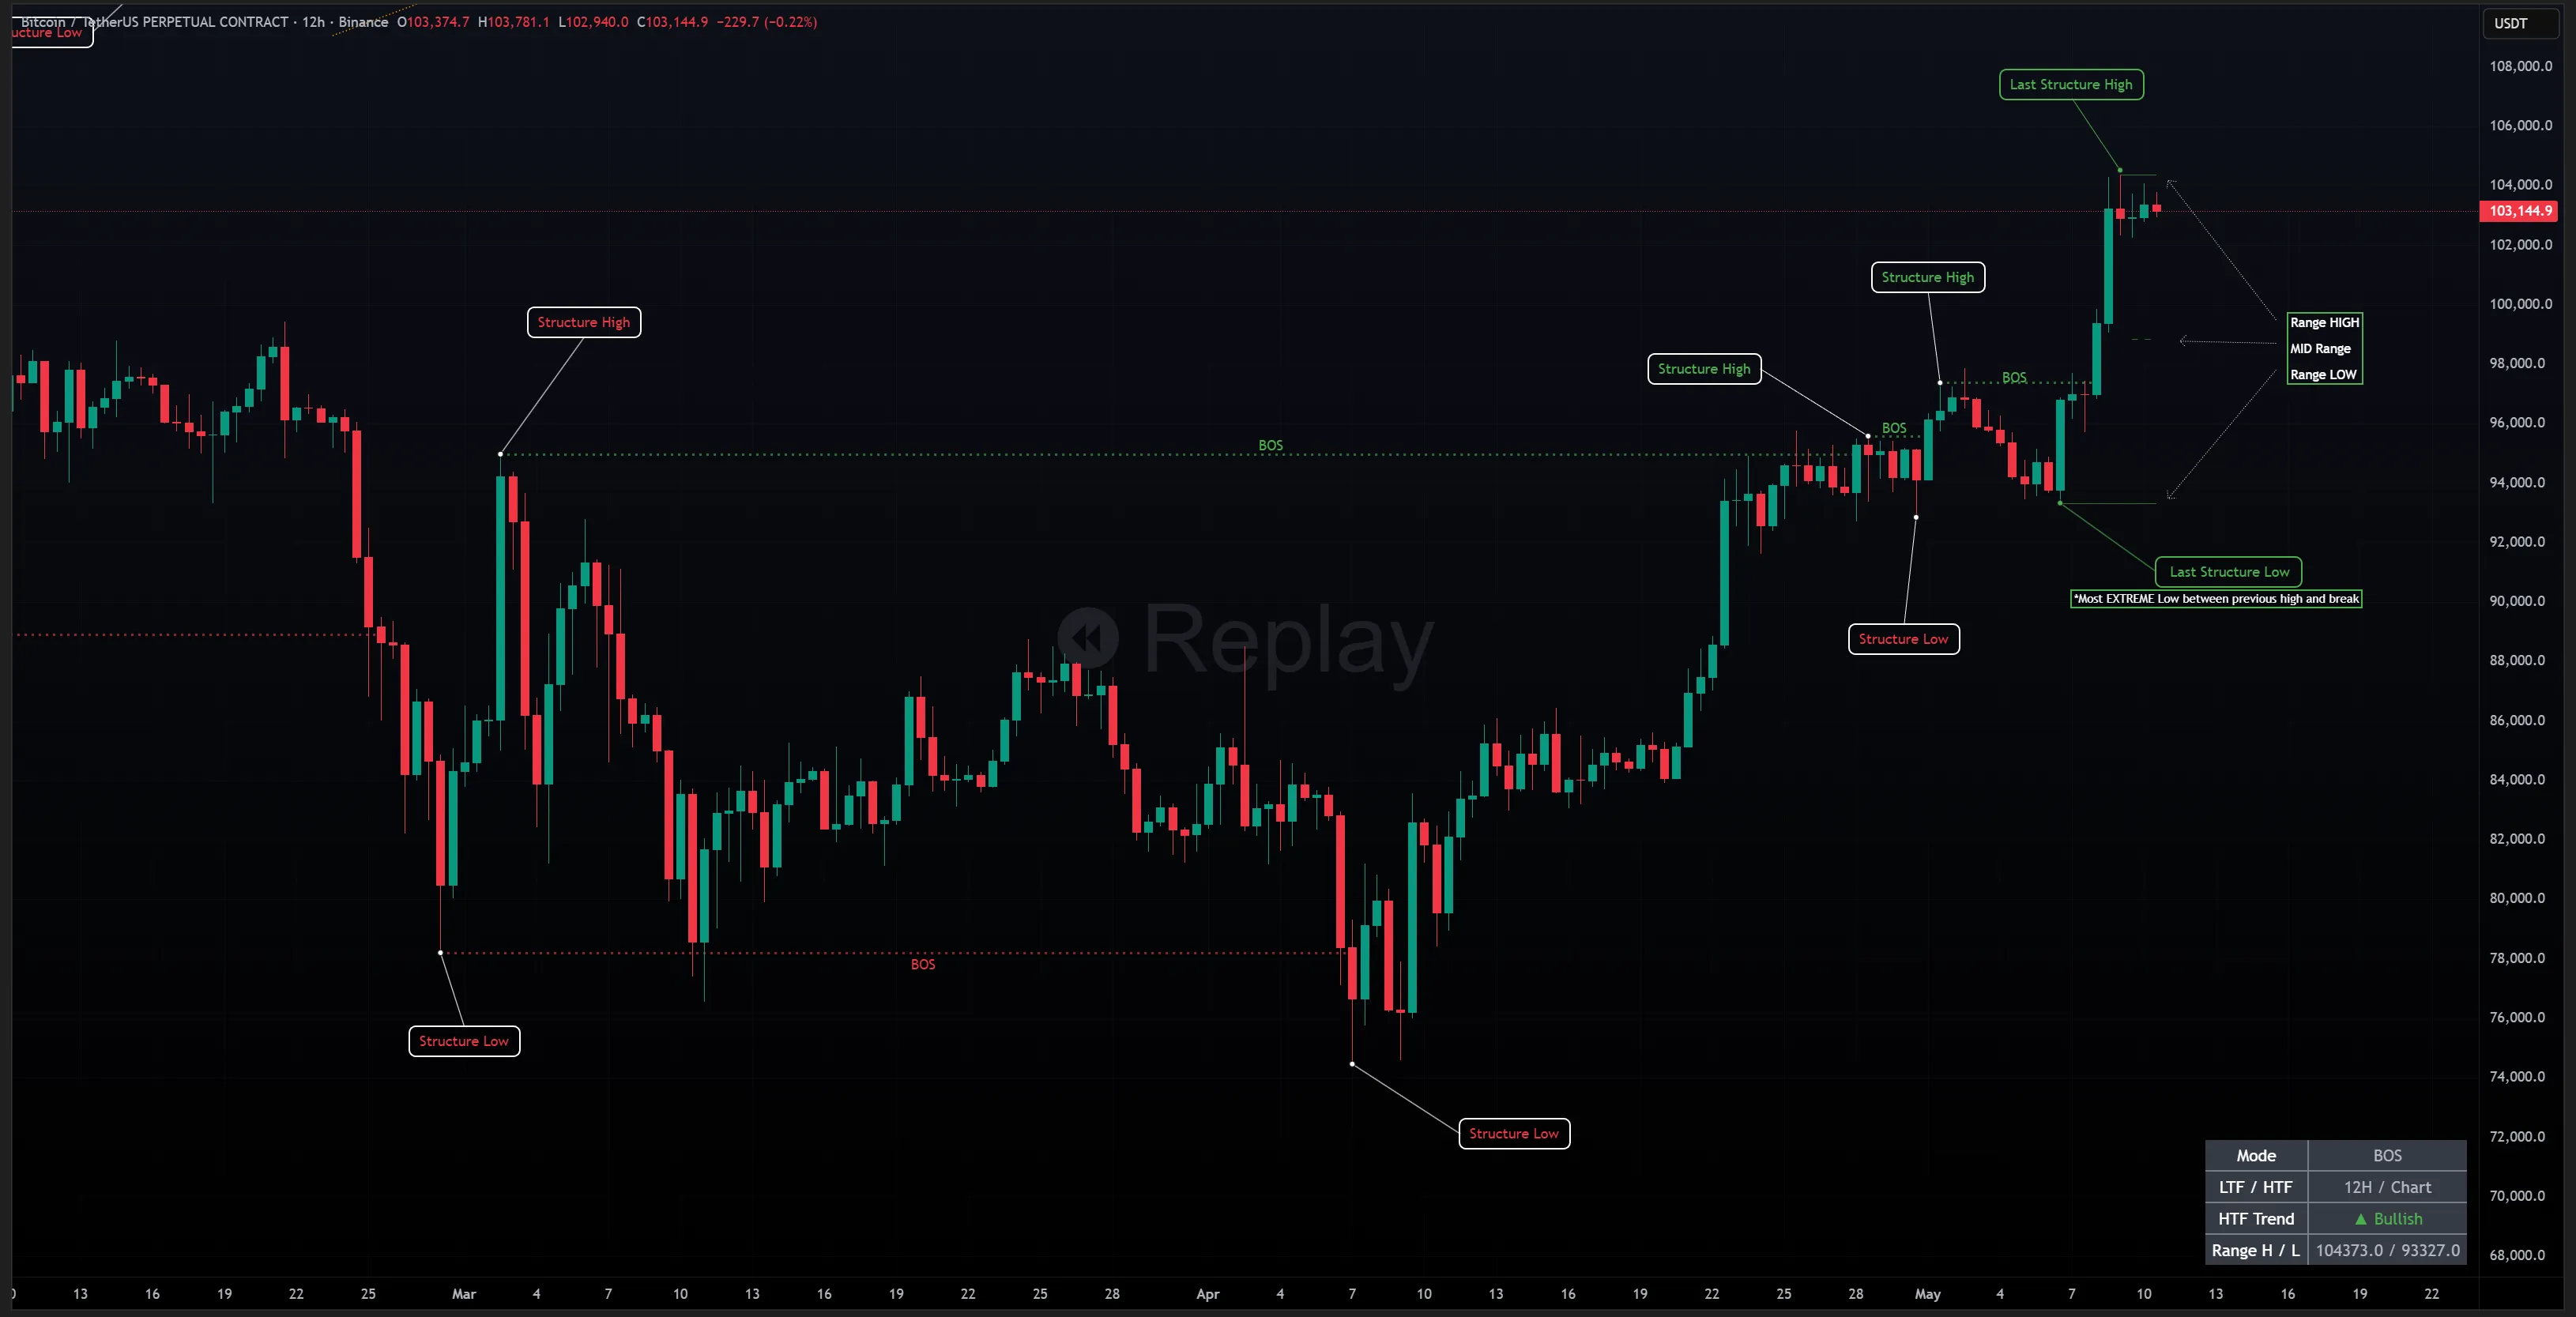
> It is mainly used by swing traders and is identified after a break, using the most extreme high or low between the previous range and the point of the break.

***

**What it means:** Trend continuation. The market has broken its most significant structural point, confirming directional bias.

> In BOS mode, the counter point is conservative — it uses the most extreme level. You'll get fewer breaks, but each one carries more weight.

<div data-with-frame="true"><figure><img src="https://2404540482-files.gitbook.io/~/files/v0/b/gitbook-x-prod.appspot.com/o/spaces%2FuK39Nj2efLknCBW9clay%2Fuploads%2Fgit-blob-cc7e3b149ebcaac1d4f9ffc92134d25c7476ae5c%2Fbosline.jpg?alt=media" alt=""><figcaption></figcaption></figure></div>

<div data-with-frame="true"><figure><img src="https://2404540482-files.gitbook.io/~/files/v0/b/gitbook-x-prod.appspot.com/o/spaces%2FuK39Nj2efLknCBW9clay%2Fuploads%2Fgit-blob-977c130fee72ebac2389fa5fa74eb1238a6bd5fb%2FBOS1.png?alt=media" alt=""><figcaption></figcaption></figure></div>

***

## OB Placement in BOS Mode

The counter point is the **most extreme** swing high or low found between the break point and the previous range extreme — the lowest low for a bullish break, the highest high for a bearish break.

<table data-header-hidden><thead><tr><th width="40"></th><th></th></tr></thead><tbody><tr><td><mark style="color:green;"><strong>→</strong></mark></td><td>The OB candle is the last opposite candle before that extreme counter point.</td></tr><tr><td><mark style="color:green;"><strong>→</strong></mark></td><td>The zone is <strong>wider</strong> and sits further from the break — the counter captures the full structural swing.</td></tr><tr><td><mark style="color:green;"><strong>→</strong></mark></td><td>Fewer breaks fire, but each zone carries more weight. Best for swing entries where broader context matters.</td></tr></tbody></table>

{% hint style="info" %}
Switching to [MSB](https://docs.rexden.ai/deep-learn/editor/structure-str/msb) moves the counter to the most recent level — producing a tighter zone closer to the break.
{% endhint %}

***
